

Project S2000
Our GT300-style Honda S2000. Follow the build from first render to finished part: 3D scans, design rounds and the new pre-preg dry carbon parts we’re making in Pomona, CA.
Images on this page are concept renders and design files. Final parts may look different.
Parts in this build
Here’s every part we’re working on for the S2000 and where each one is right now. The front bumper design is finalized. The hood and the rest are still being adjusted. We’ll update this page as parts move forward.
| Part | Status | Material |
|---|---|---|
| Front bumper | ✓ Design finalized | TBD |
| Vented race hood (AP1 & AP2) | Still adjusting · round 4 | TBD |
| Dry carbon ducktail spoiler | Still adjusting | Pre-preg dry carbon |
| Dry carbon race diffuser | Still adjusting | Pre-preg dry carbon |
| CR trunk CAD (base for the ducktail) | Matched to scan | — |
| GT300-style widebody look | Concept | TBD |
Start with the look
Every Group A kit starts as a picture. This one is a red S2000 hardtop in GT300 race trim, with a vented hood, a big front splitter with canards, a GT wing and wide rear arches. The renders set the target. Then we design each part to fit a real car.
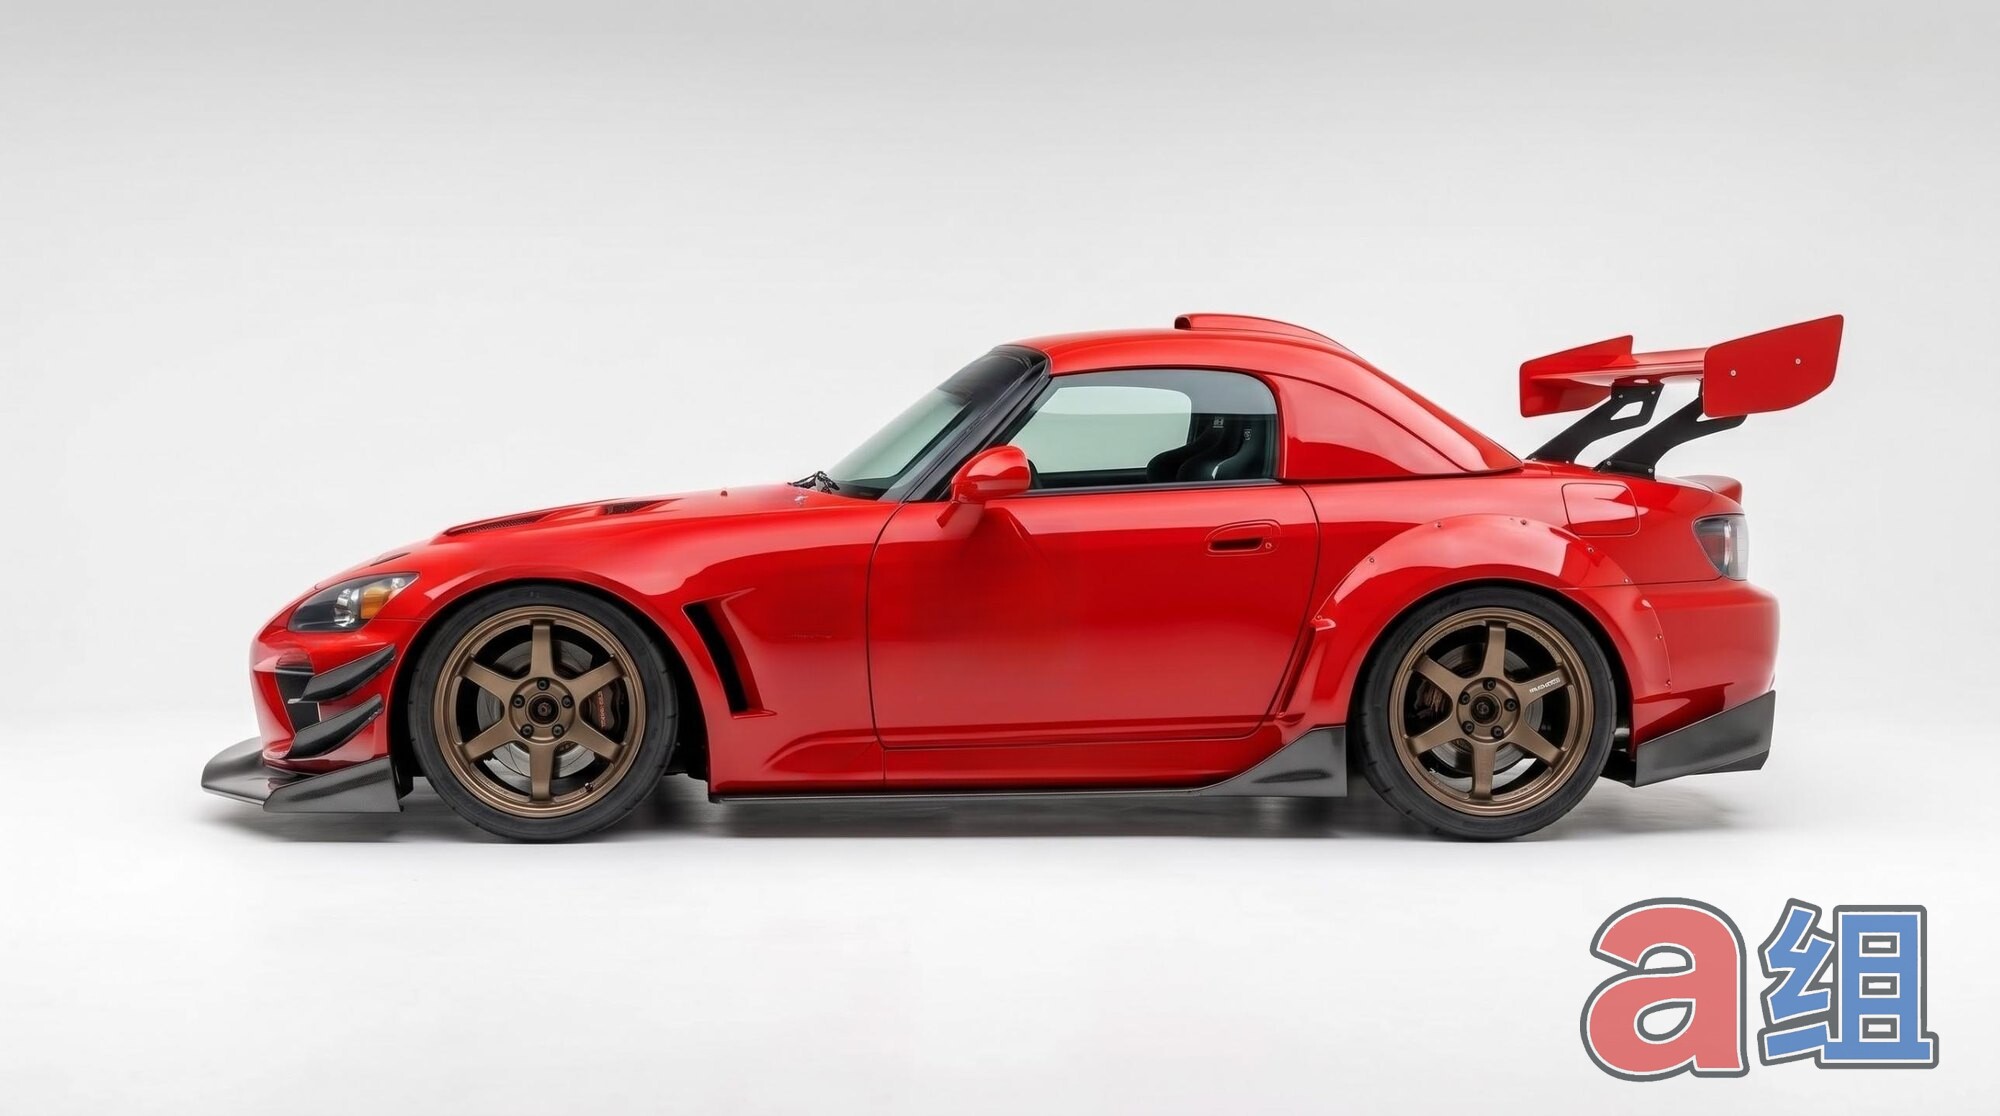

Earlier ideas. Before we settled on the GT300 look, we tried a few other front-end directions:



We 3D-scan the real thing
Before we design anything, we 3D-scan the car and the factory parts. That gives us the true shape of every panel and mounting point, so new parts are designed to fit the car instead of being guessed from photos. These are a few of our S2000 scans.
Making the CAD match the real trunk
Our designer drew the CR trunk lid in CAD. Before adding a ducktail to it, we laid the CAD over our 3D scan of a real CR trunk and measured the gap at every point. Then we corrected the CAD so it matches the real part. Grey means a match. Red means the real part sticks out past the CAD, and blue means the CAD sticks out past the real part.
- 17.8 MTriangles in the trunk scan, top and underside
- 99%Of the outer skin within ±1 mm, straight from the designer
- 0.24 mmTypical gap before correcting
- 98%Within ±0.25 mm after correcting (was 52%)
- 0.03 mmTypical gap after correcting
- 1.1 mmThe most any point had to move
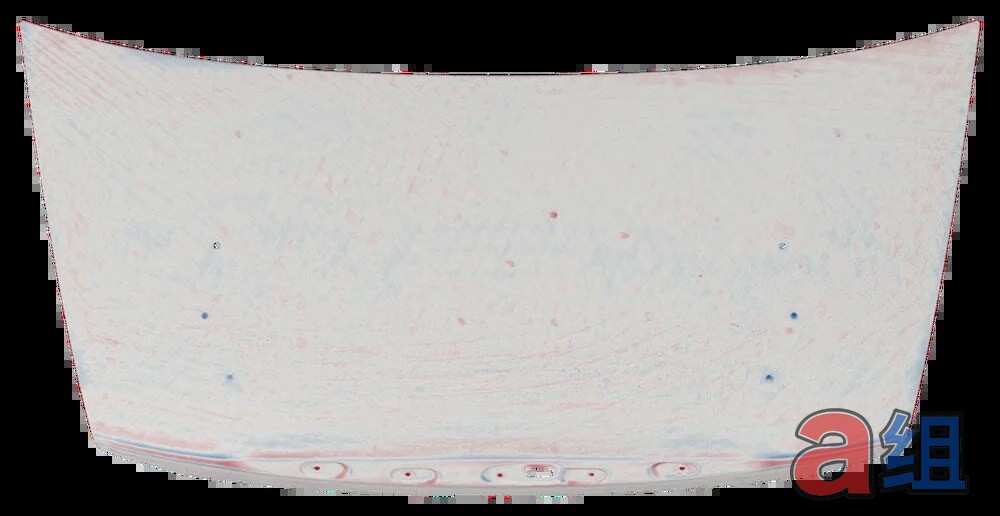
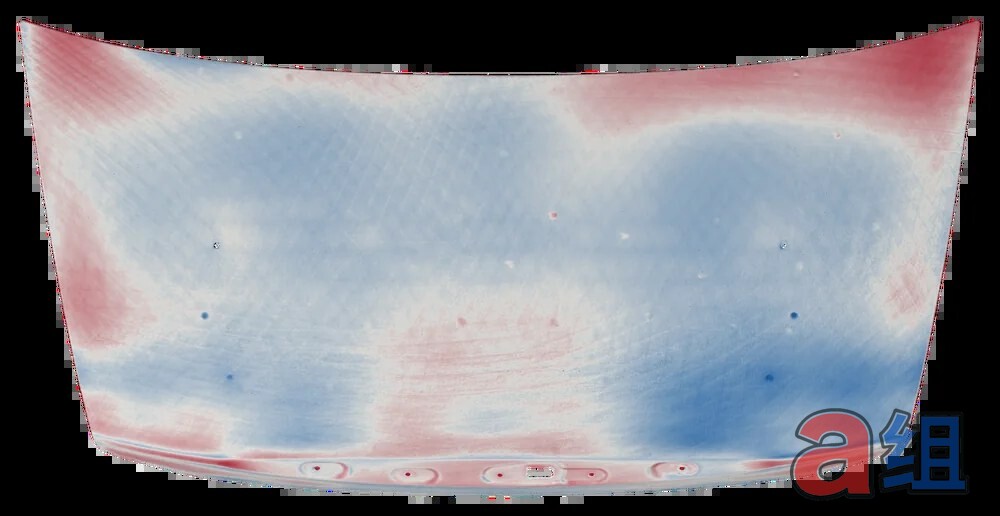
Top of the trunk lid, front edge at the top. Drag to compare the designer’s CAD before and after we matched it to the scan.
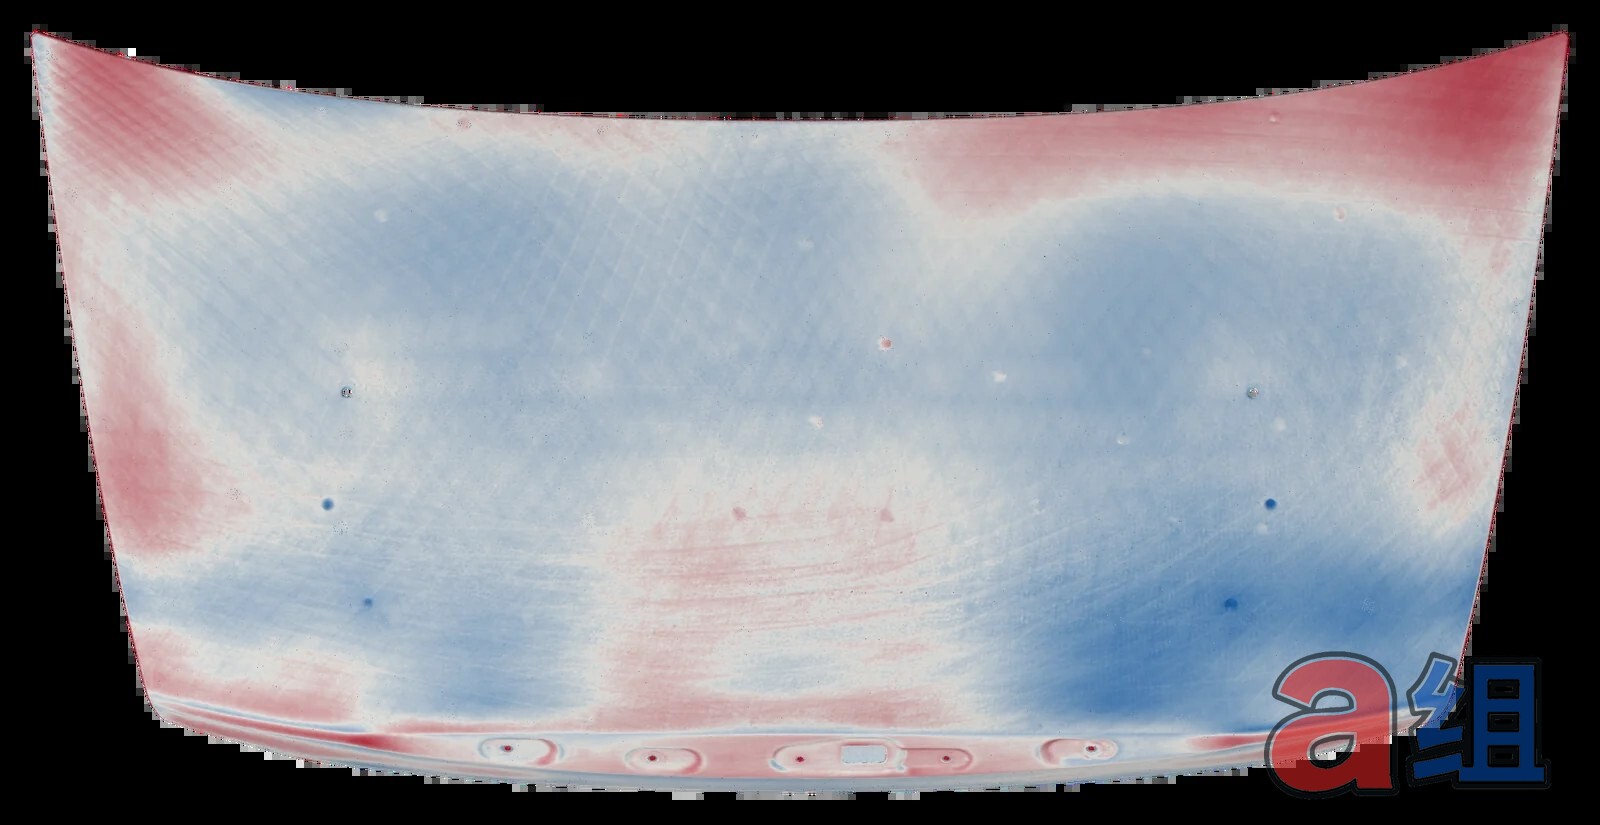
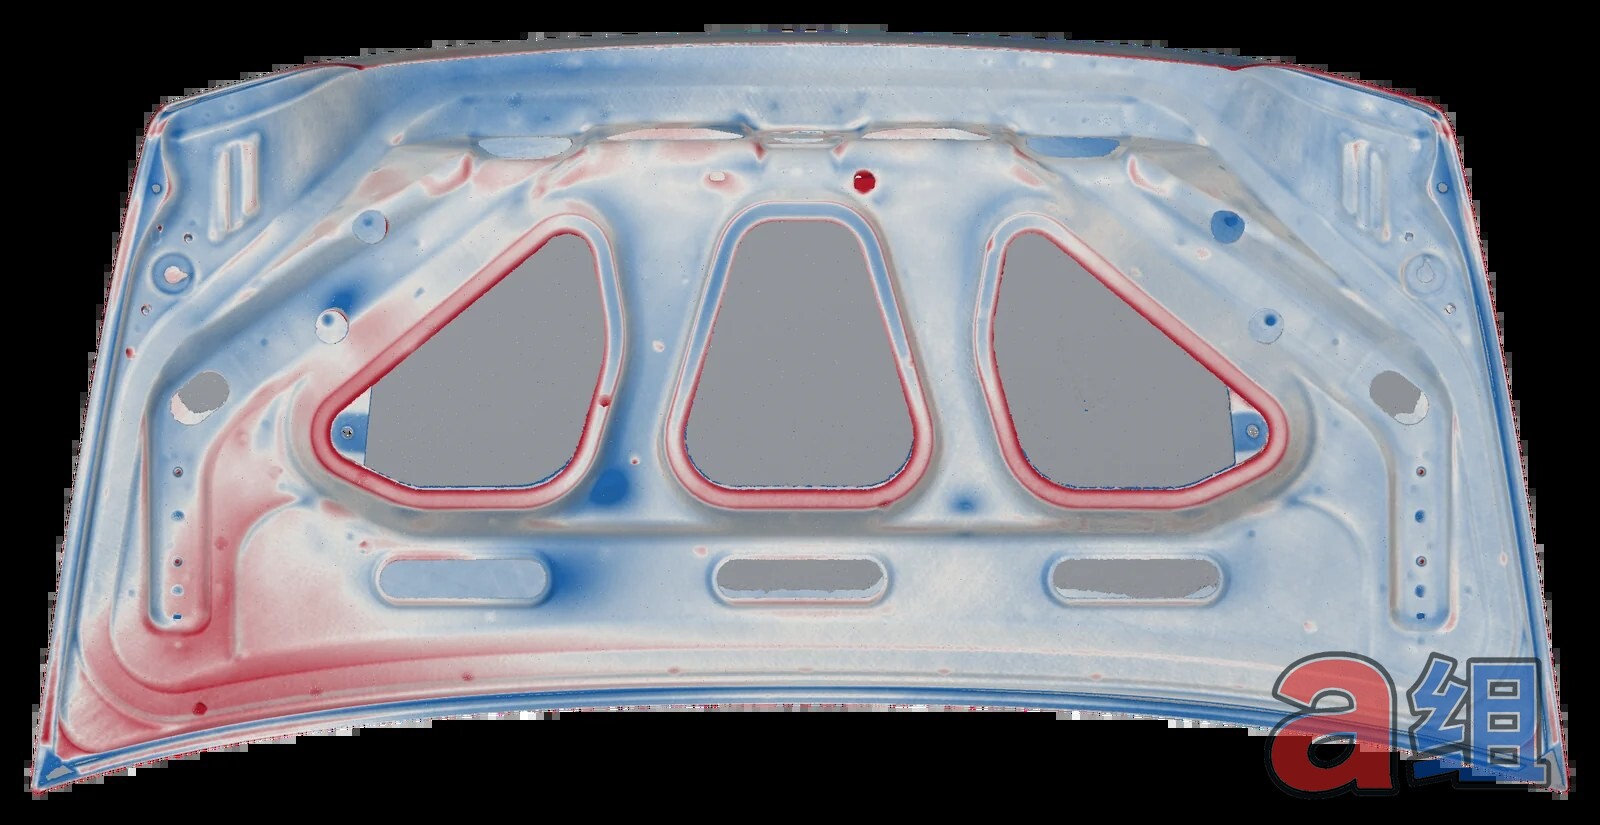
Why it matters: a part made from a corrected file fits the car the first time, with even panel gaps and no filling or forcing.
Four design rounds (so far)
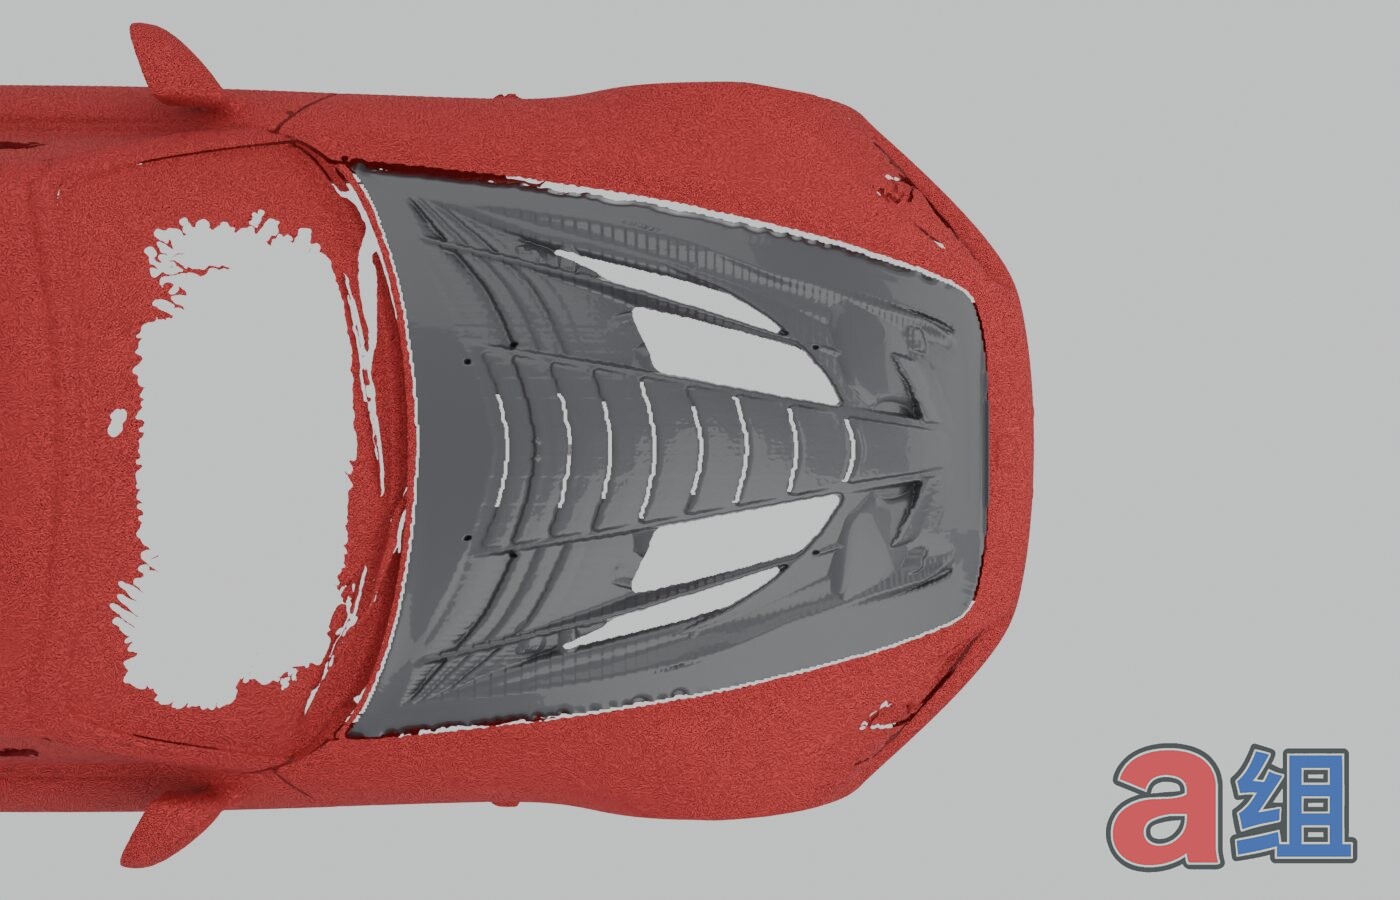
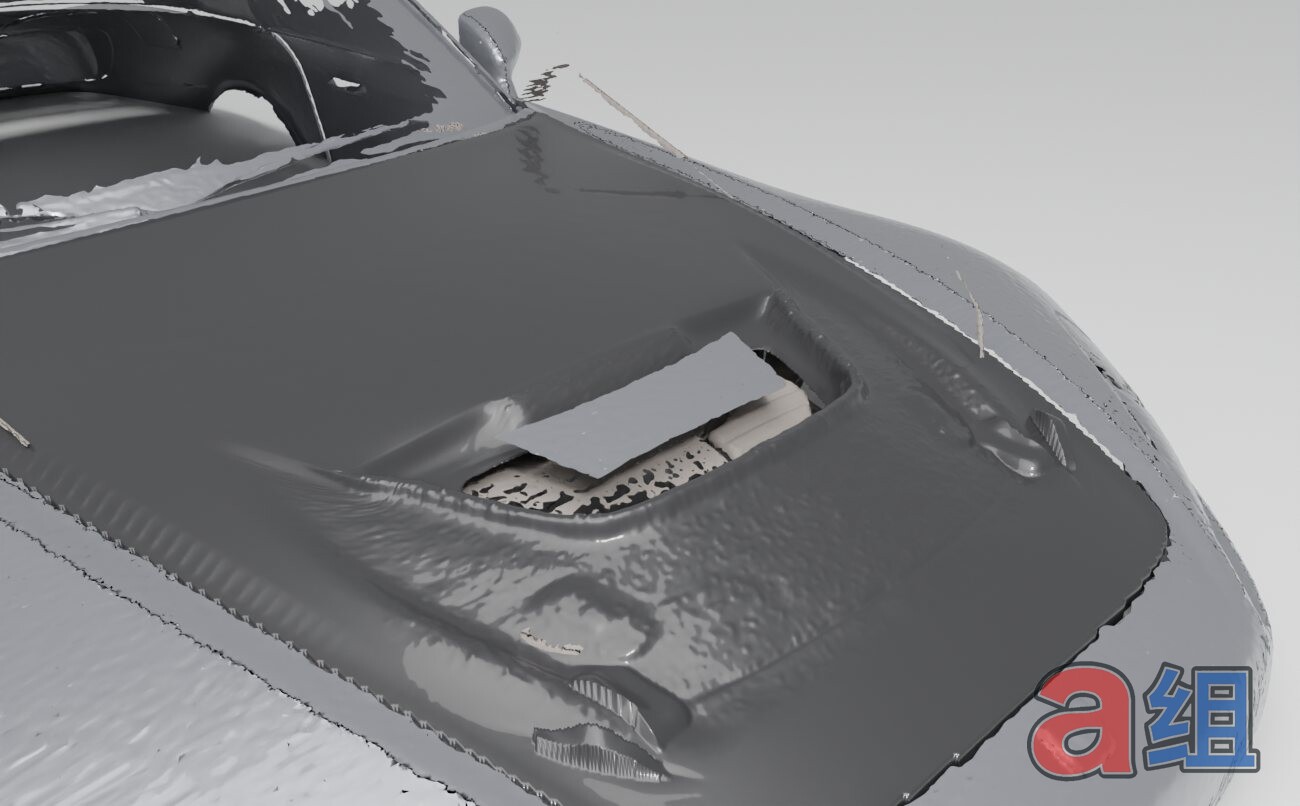
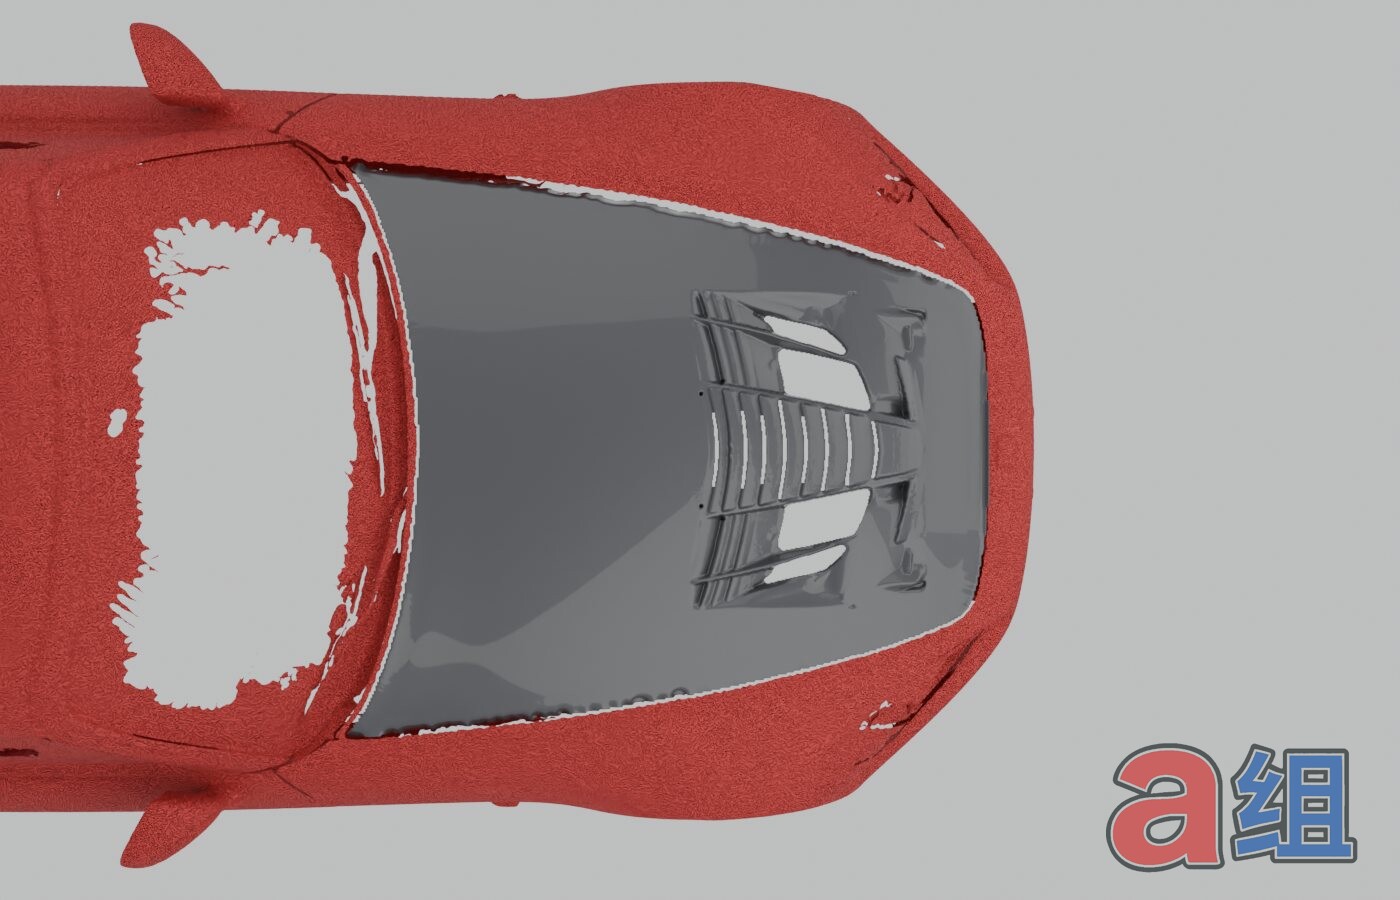
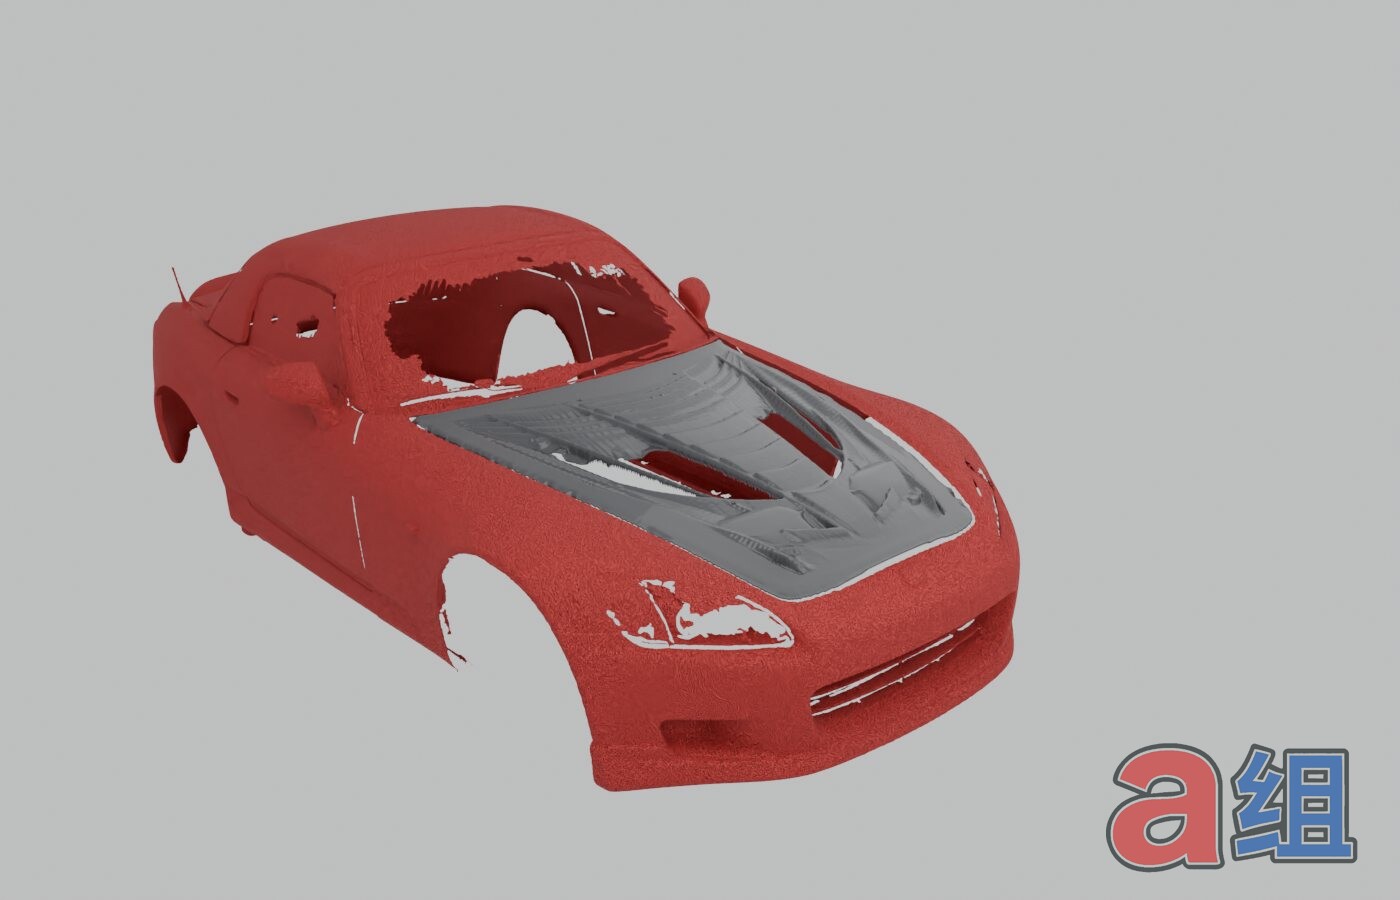
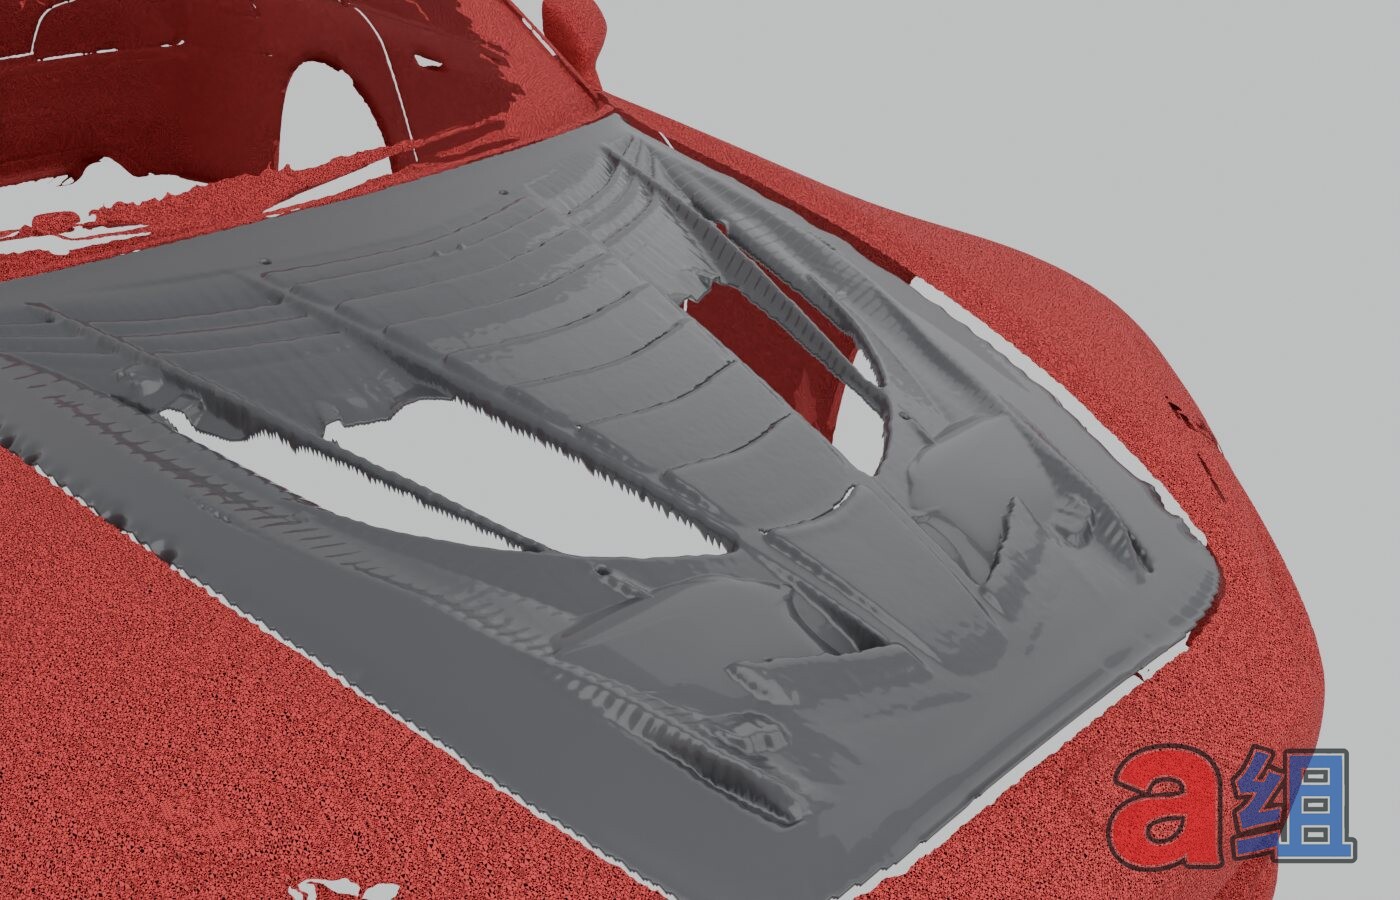
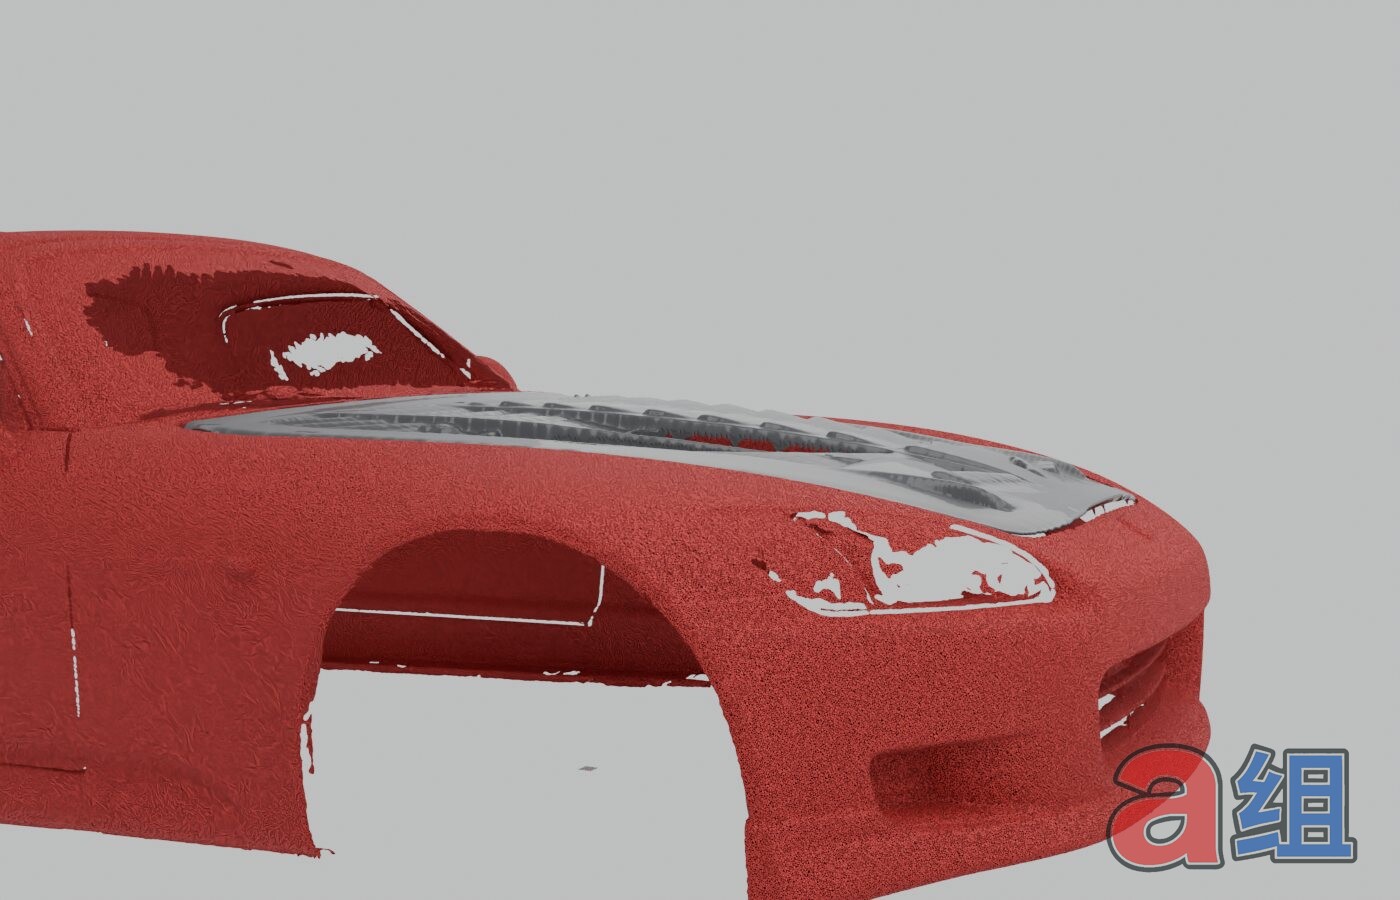
The hood vents are styled after a GT300 race hood and fully open, so hot air leaves the engine bay. The hard part is clearance: the vents and the ducts under them can’t hit anything in the engine bay. We check every round against the scan of our car. Red is the scanned car, grey is the new hood. One hood fits both AP1 and AP2.
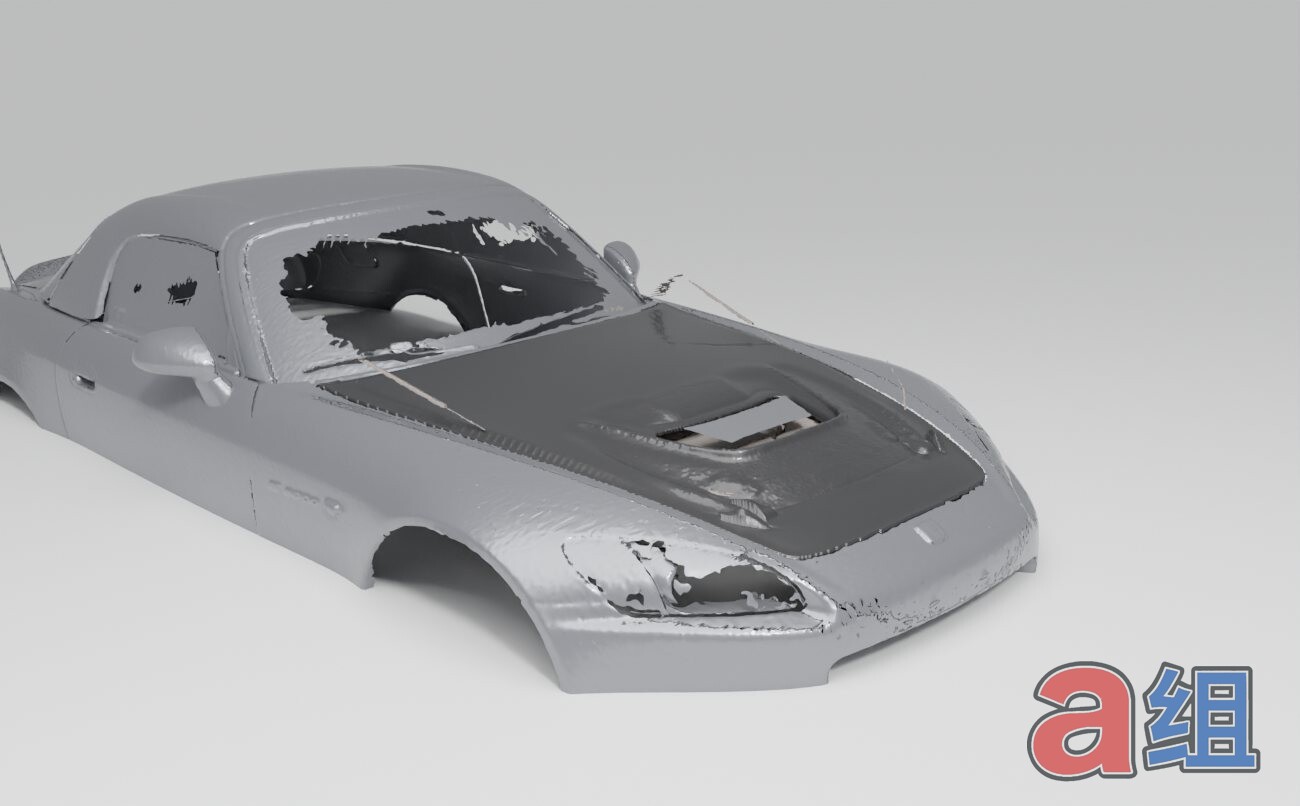
First vent placement
A single open vent placed just behind the radiator fan. The first duct under it was too deep and hit the airbox.
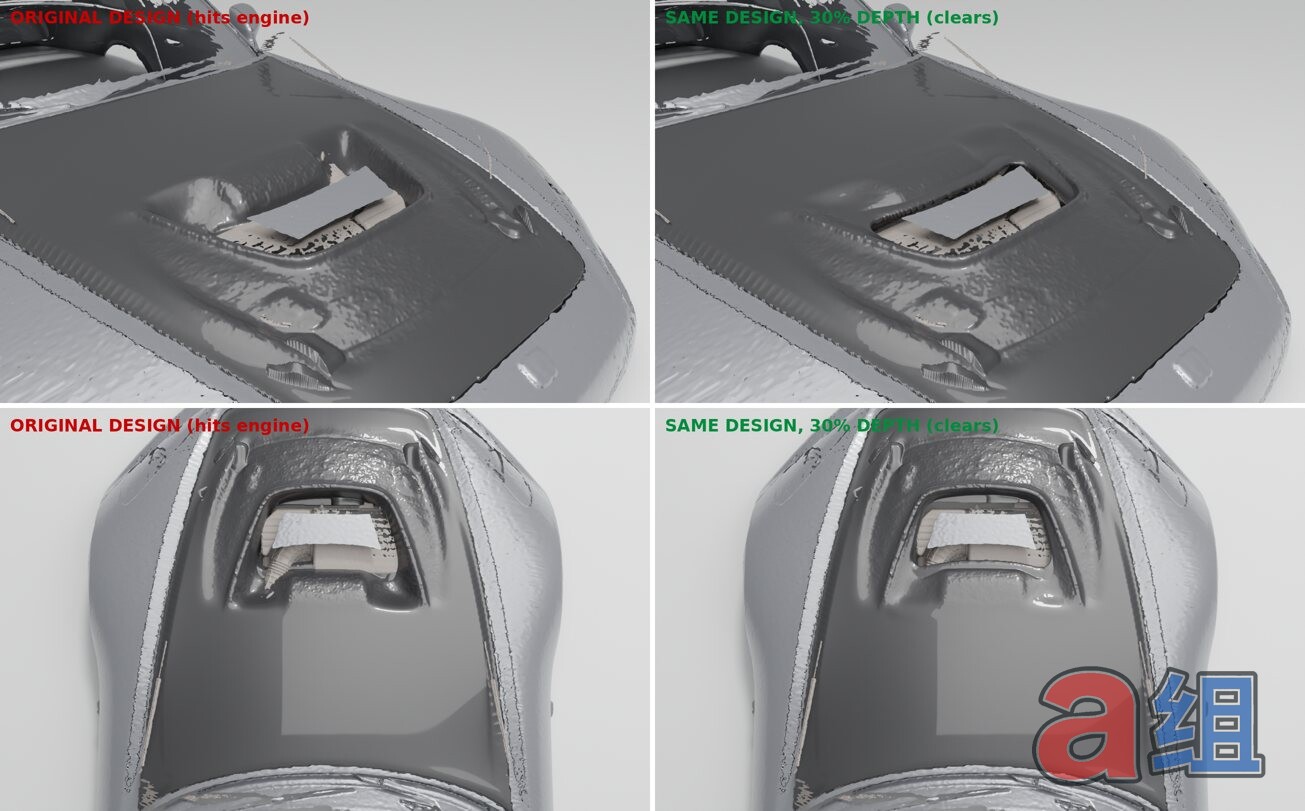
Shorter vent, rounded duct
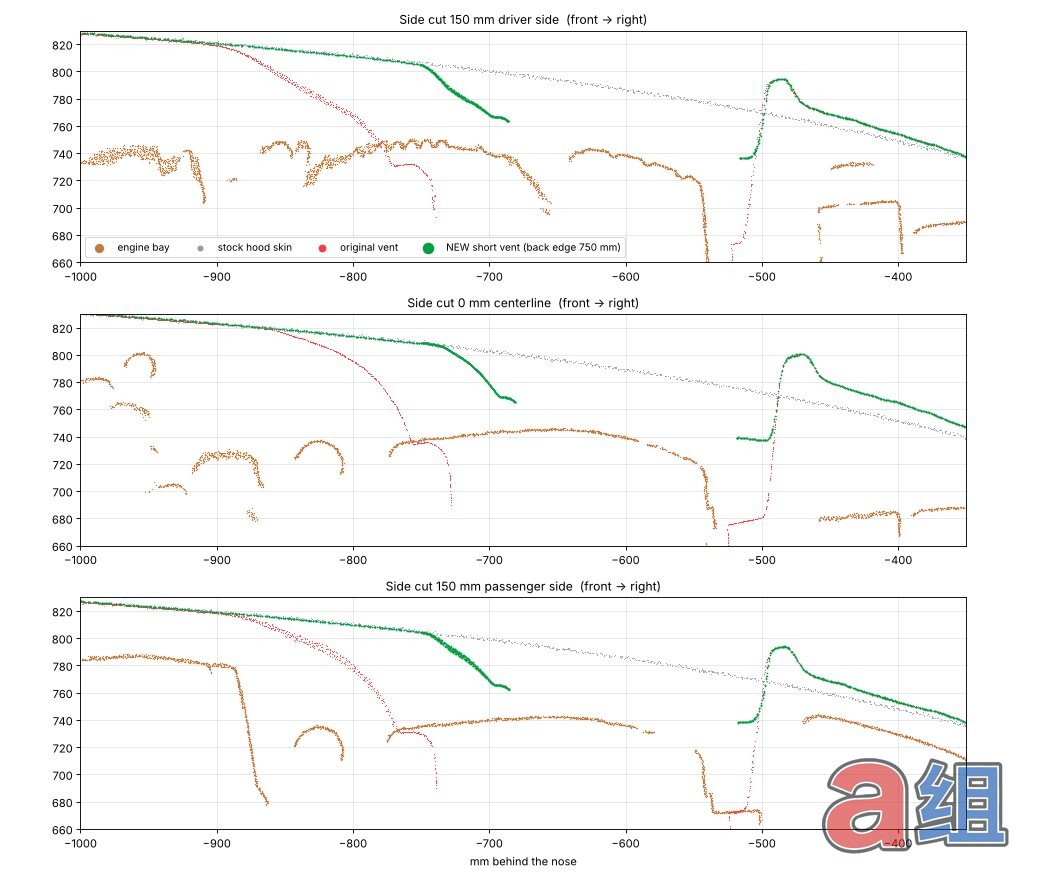
We moved the back edge of the vent forward and switched to a shallow, smooth bowl-shaped duct instead of a flat cut. The cross-sections show the gap to the engine at three points across the hood.
Louvers
We swapped the single opening for race-style louvers. It’s the same GT300 look, with more open area spread across the hood.
Full-hood louvers on the stock shape
The louvers now stretch across the hood. They’re built into the factory hood shape taken from our October car scan, so the outside lines and the fit stay stock and only the vents are new.
Dry carbon ducktail & race diffuser
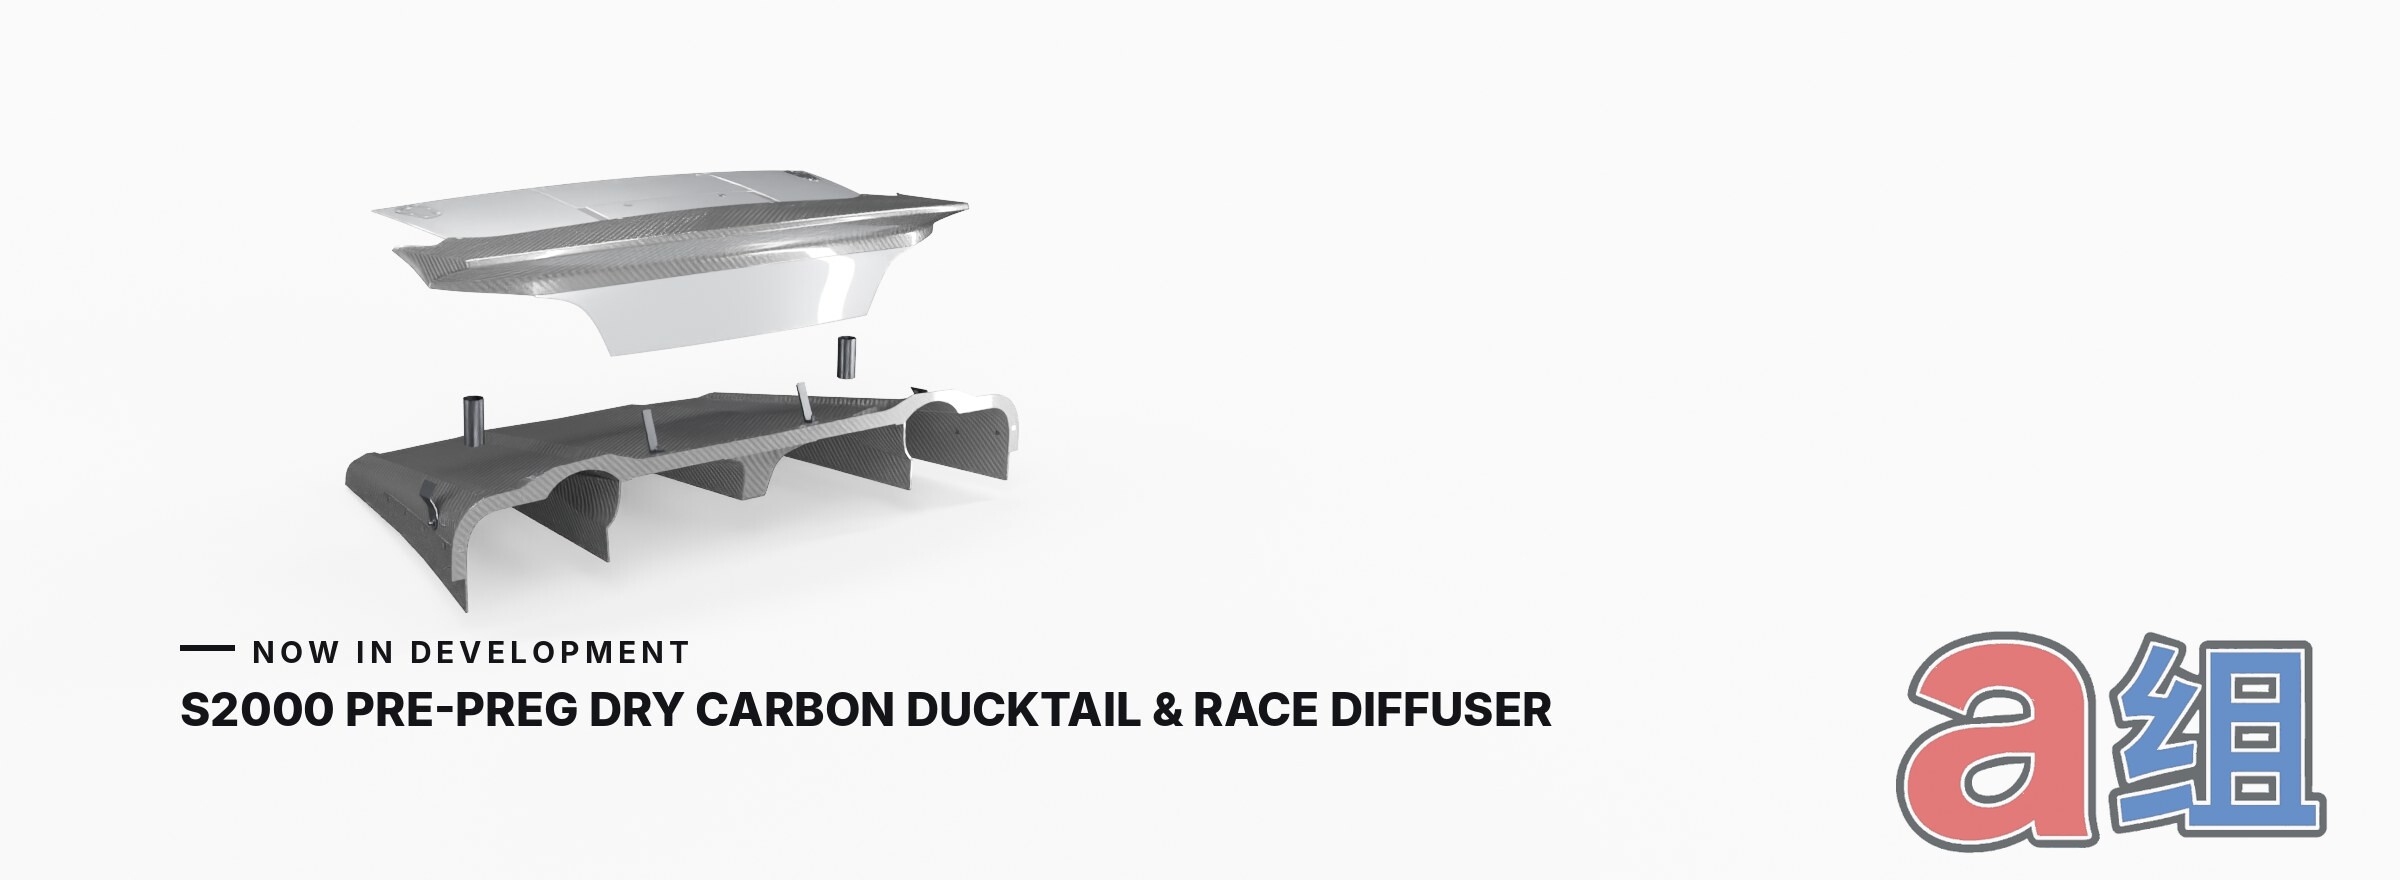
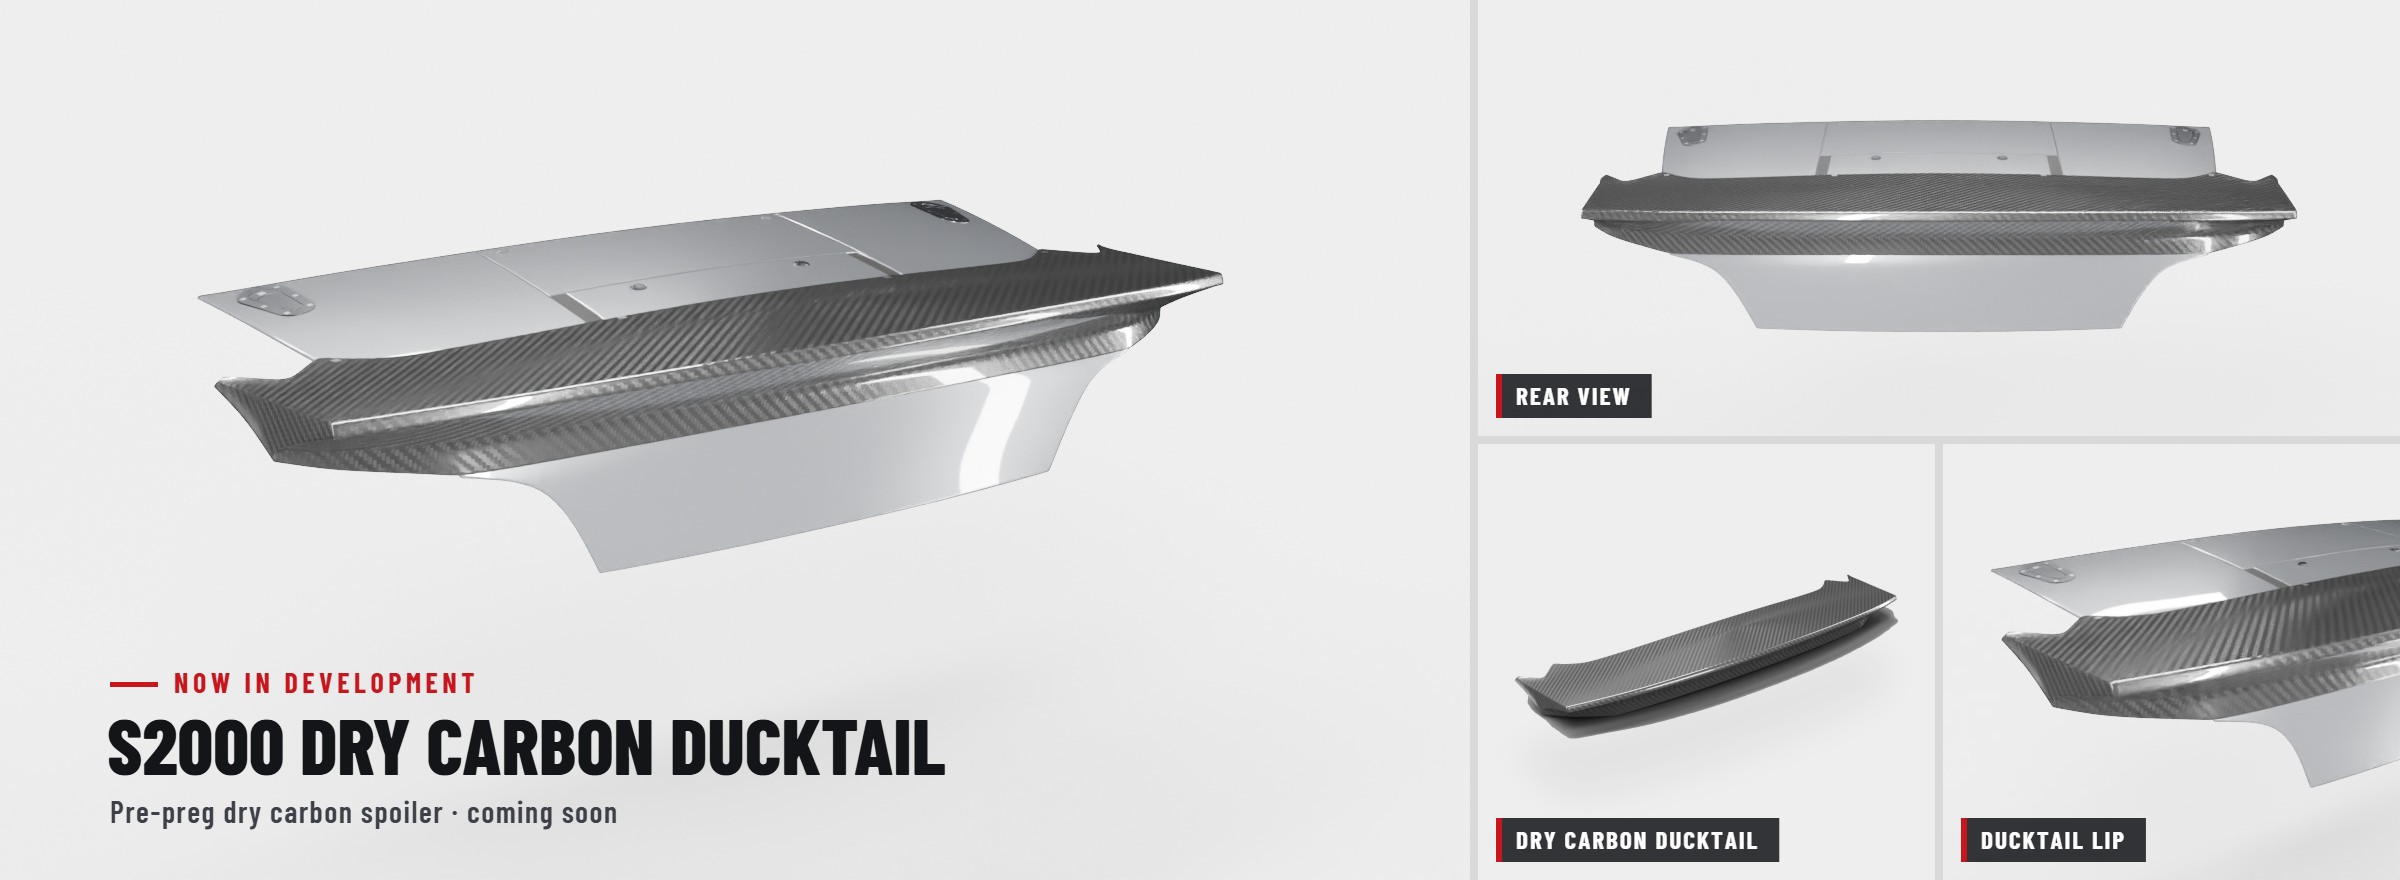
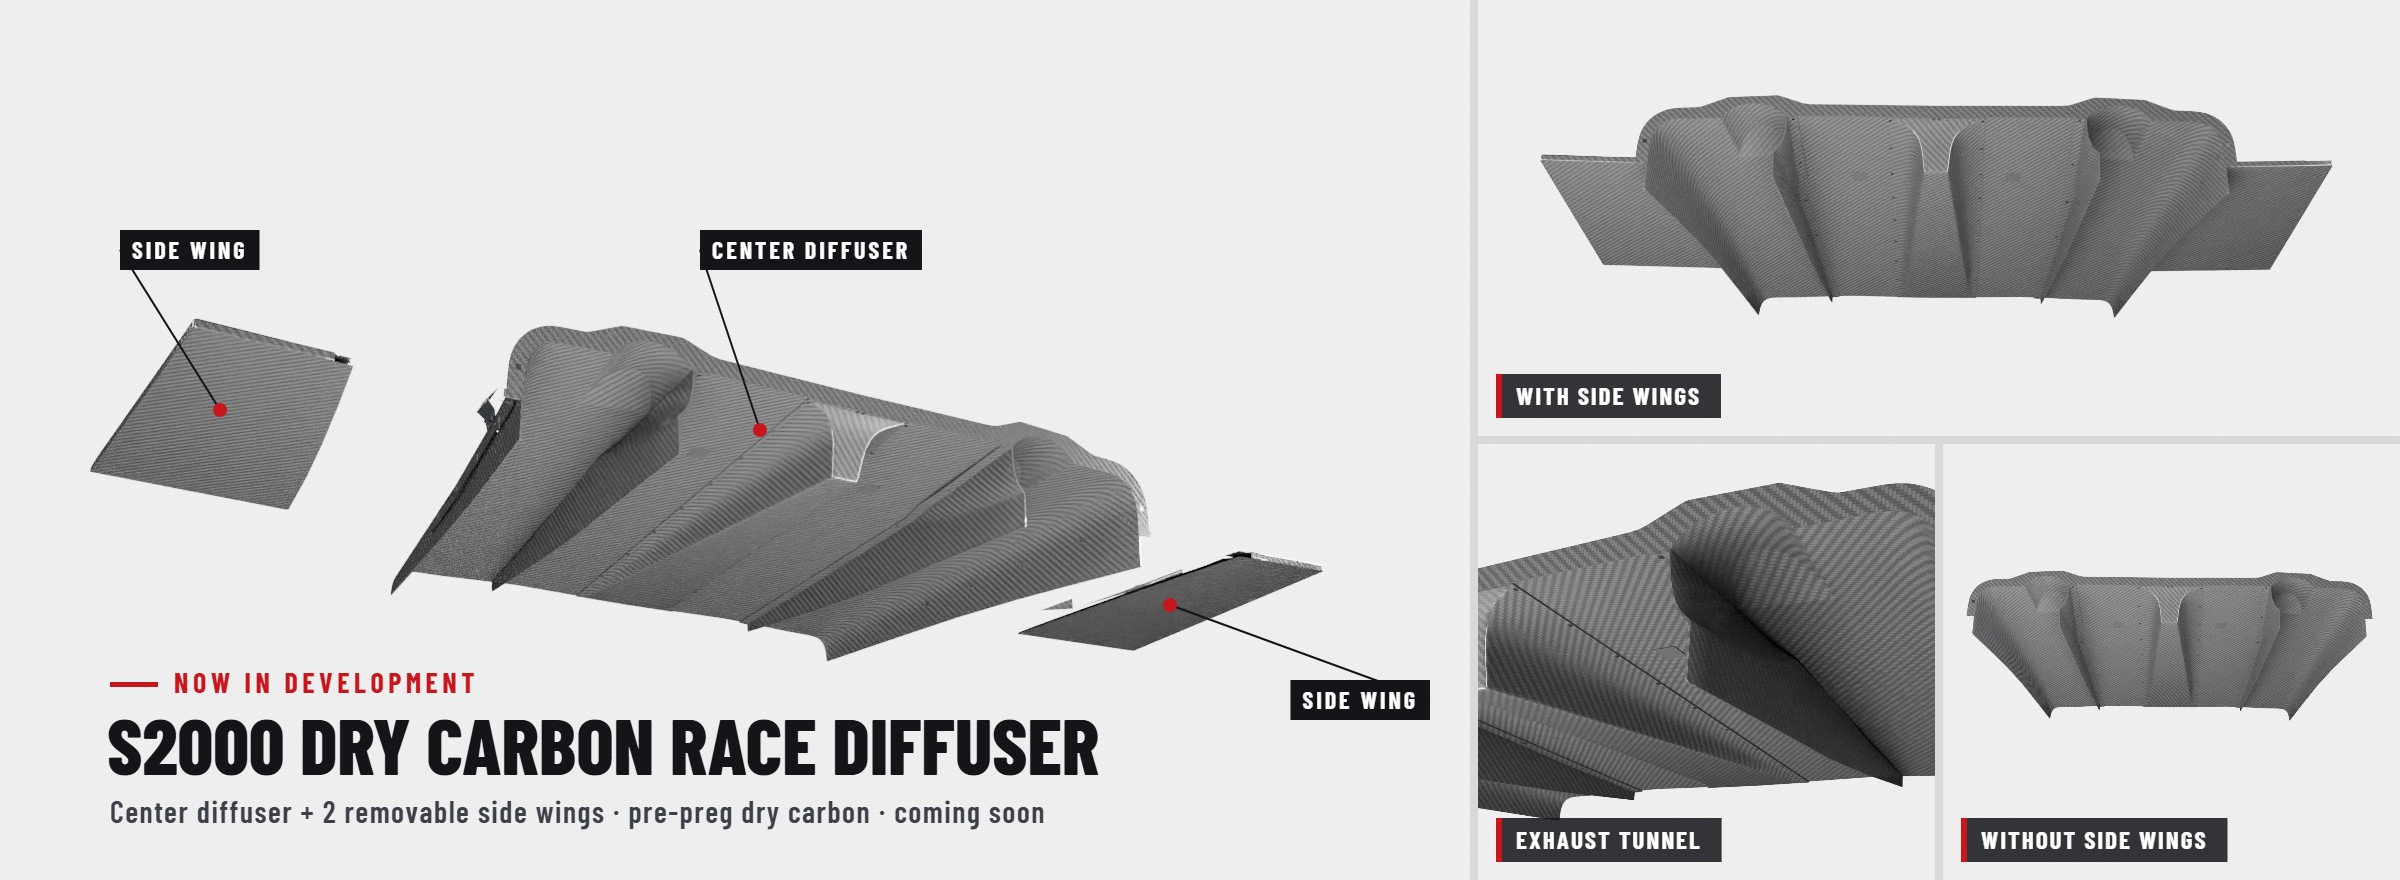
The back of the car gets two new parts, both made in pre-preg dry carbon. The ducktail is built on our scan of the CR trunk, with a taller kick that sticks out further. The race diffuser has a center section and two side wings you can take off.
From file to part
Once a design is locked, we make the plug and molds, lay up the first parts, and test-fit them on our own S2000 before anything goes on sale. Fiberglass parts are made in-house in Pomona, CA. Pre-preg dry carbon parts are made with our carbon partner.
Molds
A plug is cut from the final design file, then molds are pulled from it.
Test fit
The first parts go on our S2000 to check fit, gaps and clearance.
Release
The part goes live in the store. Updates get posted here first.
Get on the S2000 list
Tell us which part you’re after and we’ll let you know when it’s ready. You can also shop the S2000 parts we already make.